Loading... Please wait...
- 800-733-6883
- My Account
We are working on upgrading and re-launching the site, and will be back online soon!
No Orders will be accepted online or offline during this time. Thanks for understanding!
Pages
- Home
- Party Articles
- Incredible Edible Crafts
Categories
- Holidays
- Party Supplies
- Shop By Themes
- Super Mario Brothers
- Mario Kart Wii
- The Octonauts
- Disney Frozen
- Paris Damask
- Star Wars
- Caillou
- Two-Two Train 2nd Birthday
- Avengers Assemble
- Ninja Warrior Party
- Barnyard
- Barnyard 2nd Birthday
- Owl Blossom
- Monster High
- Pink Mod Monkey
- Ballerina Tutu
- Carnival Games
- Candy Shoppe
- 1st Birthday Diva
- 70's Disco
- A New Little Prince
- A Nightmare on Elm Street
- Adventure Time
- Airplane Adventure
- Aladdin
- Alice in Wonderland
- Alligator
- Aloha Birthday
- Anchors Aweigh
- Anchors Aweigh 1st Birthday
- Angry Birds
- Animal Print Leopard
- Another Year of Fabulous
- Arizona Diamondbacks
- Atlanta Hawks
- Austin Powers
- Bachelorette Party
- Baking Bash
- Baltimore Orioles
- Bamboo Weave Luau
- Barbie All Doll'd Up
- Baseball
- Baseball Birthday
- Baseball Fan Birthday
- Baseball Time
- Basketball
- Basketball Birthday
- Basketball Fan
- Batgirl
- Batman
- Batman Dark Knight
- Batman Heroes and Villains
- Beauty and the Beast
- Beetlejuice
- Beyblade
- Big Top
- Birthday Jamboree
- Black and White Check
- Birthday Princess
- Black and White Check Birthday
- Black and White Dots
- Blue and White Dots
- Blue Elephants 1st Birthday
- Blue Polka Dot
- Bob the Builder
- Born to Rock
- Boston Red Sox
- Bowling
- Boy's Lil' Cupcake 1st Birthday
- Boy's Little 1
- Boys Only
- Bubble Guppies
- Camo Gear
- Camouflage
- Candy Land
- Captain America
- Celebrate
- Chevron Black
- Chevron Blue
- Chevron Green
- Chevron Pink
- Chevron Red
- Chevron Yellow
- Chic Wedding Cake
- Chloe's Closet
- Chuggington
- Cincinnati Reds
- Cinderella
- Circus & Carnival
- Cleveland Indians
- Colorado Rockies
- Colorful Commencement Graduation
- Congrats Grad White Graduation
- Construction Pals
- Construction Pals 1st Birthday
- Construction Pals 2nd Birthday
- Cops and Robbers Party
- Cow
- Cowboy
- Cowboy 2nd Birthday
- Curious George
- Cut the Rope
- Dallas Cowboys
- Dallas Mavericks
- DC Comics
- Despicable Me 2
- Detroit Pistons
- Dinosaur Roarrrrrr
- Dinosaur Train
- Dinosaurs
- Director's Cut Hollywood
- Disney 1st Birthday Cars
- Disney 1st Birthday Princess
- Disney Brave
- Disney Cars Dream Party
- Disney Cinderella Sparkle
- Disney Fanciful Princess
- Disney Junior Doc McStuffins
- Disney Junior Sofia the First
- Disney Mickey Fun and Friends
- Disney Mickey Playtime
- Disney Minnie Dream Party
- Disney Monsters U
- Disney Nemo's Coral Reef
- Disney Planes
- Disney Pooh and Pals
- Disney Princess
- Disney Princess Dreams
- Disney Princess Fairytale Friends
- Disney The Little Mermaid Sparkle
- Disney Very Important Princess Dream Party
- Disney's Cars 2
- Disney's Tangled
- Diva Zebra
- Diva Zebra 1st
- Donkey Kong
- Dora and Friends
- Dora's Flower Adventure
- Dr. Seuss ABC
- Easter Tulips
- Edward Scissorhands
- Elegant Prince Damask
- Elegant Princess Damask
- Elegant Princess Damask 1st Birthday
- Elegant Wedding
- Elf
- Elmo's 1st
- Elvis Presley
- Enchanted Unicorn
- Enchanted Unicorn 2nd Birthday
- Everything One Boy
- Everything One Girl
- Faithful Dove Pink Christening
- Falling Flakes
- Farm Animals
- Fashionista
- Fiesta Grande
- Fire Trucks
- Fisher Price Baby Shower
- Flip Flop
- Florida Marlins
- Flutterby Butterflies
- Football
- Football Frenzy
- Football Game Time
- Franklin and Friends
- Friday the 13th
- Frightfully Fancy Halloween
- Froggie Fun
- Froggie Fun 2nd Birthday
- Fun in the Sun
- Garden Fairy
- Georgia Bulldogs
- Get Wicked Cocktail
- Giddy Up Cowboy
- Giraffe
- Giraffe 1st Birthday
- Girl's Lil' Cupcake 1st Birthday
- Girl's Lil' Cupcake 2nd Birthday
- Girl's Little 1
- Girl's Night Out Bachelorette Party
- Girls Only
- Glee
- Goldfish
- Goth Feast
- Grad Celebration Graduation
- Grad Spirit Graduation 2012
- Grad Stars Graduation
- Green and White Dots
- Grill Master BBQ
- Halloween Party
- Halo 3
- Harry Potter
- Hawaiian Girl
- Hello Kitty Balloon Dreams
- Hibiscus
- Hippie Chick
- Hippity Hop
- Hippo Blue
- Hippo Pink
- Hollywood
- Holy Bleep
- Hooray for Elmo
- Horse Power
- Horses
- Houston Astros
- How to Train Your Dragon 2
- Hugs & Stitches
- I Love Lucy
- I Love Puppies 1st Birthday
- Ice Cream Sprinkles
- In The Garden
- Indiana Jones
- Indianapolis Colts
- Itzza Pizza Party
- Jacksonville Jaguars
- Jake and the Neverland Pirates
- Johnny Test
- Johnny Tractor 1st
- Joyful Snowman
- Just Dance
- Just Ducky 1st Birthday
- Kansas City Royals
- Knight
- LadyBug Fancy
- LadyBugs
- LadyBugs: Oh So Sweet
- LadyBugs: Oh So Sweet 2nd Birthday
- Lalaloopsy
- Let Them Eat Cake
- Let's Go Camping
- Lil' Prince 1st
- Lil' Princess 1st Birthday
- Lil' Quarterback 1st Birthday
- Lil' Slugger 1st Birthday
- Little Buccaneer
- Little Dino
- Little Dino 1st Birthday
- Little Man Mustache
- Little Man Mustache 1st Birthday
- Little Mermaid
- Little Spa Party
- Little Sunshine Party
- Littlest Pet Shop
- Look Whoo's 1 Blue
- Look Whoo's 1 Pink
- Los Angeles Angels
- Los Angeles Dodgers
- Luau
- LumberJack
- Madagascar 3
- Madeline
- Martial Arts
- Marvel Super Hero Squad
- Mermaids
- Mermaids Under the Sea
- Michael Jackson
- Michigan State Spartans
- Mickey Mouse Clubhouse
- Mickey's 1st Birthday
- Milwaukee Bucks
- Minnesota Timberwolves
- Minnie Mouse
- Minnie's 1st Birthday
- Missouri Tigers
- Mod Monkey
- Monster Jam
- Monster Jam 3D
- Monster Mania
- Monster Truck
- Mustache Man
- My Little Pony
- My Little Pony Friendship Magic
- NASA
- Nascar Full Throttle
- Nebraska Cornhuskers
- New York Giants
- NFL Drive
- Ni Hao, Kai-Lan
- Nickelodeon Teenage Mutant Ninja Turtles
- Nightmare On Elm Street
- Nighty Night BaZooples
- Nintendo
- Oakland Athletics
- Ocean Preppy Girl
- Oktoberfest
- Olivia
- Orlando Magic
- PAC-MAN and the Ghostly Adventures
- Pajanimals
- Penguins of Madagascar
- Philadelphia Phillies
- Phineas and Ferb
- Phoenix Suns
- Pink and White Dots
- Pink Cowgirl
- Pink Elephants 1st Birthday
- Pink Mustache
- Pink Poodle in Paris
- Pink Poodle in Paris 1st Birthday
- Pink Skull
- Pink Zebra Boutique
- Pink!
- Pinkalicious
- Pinocchio
- Pirate Party
- Pirates
- Pirates of the Caribbean
- Pittsburgh Panthers
- Playful Puppy Blue
- Playful Puppy Blue 1st
- Playful Puppy Pink
- Pocoyo
- Pokemon
- Polka Dot Garden
- Ponies
- Pooh and Friends
- Pooh's 1st Balloon
- Power Rangers Samurai
- Predator
- Pretty Pirates Party
- Prima Ballerina
- Princess Amira
- Princess and the Frog
- Quatrefoil
- rachaelhale Glamour Cats
- rachaelhale Glamour Dogs
- Rainbow
- Rainbow Wishes
- Rapunzel
- Red and White Dots
- Robots 2nd Birthday
- Rock Star
- Rock Star 2nd Birthday
- Rubber Ducky Birthday
- Safari Adventure Party
- Safari Friends 1st
- Safari Party
- San Diego Padres
- Scooby Doo
- Scooby-Doo Mod Mystery
- Sea Life
- Seattle Mariners
- Secret Agent
- Sesame Street
- Sesame Street 1st
- Sesame Street Beginnings 1st Birthday
- Sesame Street Elmo Party
- Sesame Street Party
- Sesame Street Sunny Days
- Sharks
- Shrek
- Shrek Forever After
- Silver Wedding
- Skylanders
- Sleeping Beauty
- Smurfs
- Smurfs 2
- Snoopy
- Snow White
- Soccer Birthday
- Soccer Fan Birthday
- Sock Monkey Blue
- Sock Monkey Pink
- Sock Monkey Red
- Sonic the Hedgehog
- Space Mission
- Special Forces
- Spider Hero Dream Party
- Spider-Man Spider Sense
- Splashin' Pool Party
- Sponge Bob
- SpongeBob
- Sports
- St Patrick's Day
- St. Louis Cardinals
- St. Pat Argyle
- Star Trek
- Strawberry Shortcake
- Sucker Punch
- Summer Splash Luau
- Summer Time Fun
- Sunny Stripe Pink
- Super Stylish
- Super Stylish 16
- Super Why
- Supergirl
- Superhero Comics
- Superman
- Superman: Man of Steel
- Sweet Blessing Blue Baptism & Christening
- Sweet Pea 1st Birthday
- Sweet Safari Blue 1st Birthday
- Sweet Safari Pink 1st Birthday
- Sweet Treats
- Sweet Tweet Bird Blue
- Sweet Tweet Bird Pink
- Sweet-As-Can-Bee
- Sweet-As-Can-Bee 1st Birthday
- Tampa Bay Buccaneers
- Tampa Bay Rays
- Tea For You
- Teenage Mutant Ninja Turtles
- Texas Chainsaw Massacre
- Texas Longhorns
- Thanksgiving Blessing
- The Addams Family
- The Amazing Spider-Man
- THE DOG
- The Jungle Book
- The Legend of Zelda
- The Lion King
- The Lord of the Rings
- The Twilight Saga: Breaking Dawn
- The Twilight Saga: Eclipse
- Thomas the Tank Engine
- Thor: The Mighty Avenger
- Tickety Toc
- Tie Dye Fun
- Tim Burton's The Nightmare Before Christmas
- Tinker Bell
- Tiny Toes Blue Baby Shower
- Tiny Toes Pink Baby Shower
- Tony Hawk's New Boom Boom HuckJam
- Topsy Turvy Tea Party
- Toronto Blue Jays
- Totally 80's
- Totally Fabulous Baby Shower
- Toy Story
- Toy Story 3
- Transformers
- Transformers Revenge of the Fallen
- Tropical Breeze
- Tropical Vacation
- Truck Party
- Turbo
- Two Peas in a Pod Baby Shower
- Uglydoll
- Umbrellaphants Blue Baby Shower
- Umbrellaphants Pink Baby Shower
- Under Construction
- Under the Big Top
- USC Trojans
- Utah Jazz
- V for Vendetta
- Victorious
- Video Games
- Washington Huskies
- Washington Nationals
- Washington Redskins
- Washington Wizards
- Watercolor Leaves
- West Virginia Mountaineers
- Western Bandanarama
- Western Bandanarama Birthday
- Western Lasso Cowgirl
- Whale of Fun
- Whale of Fun 1st Birthday
- White Winter Christmas
- Wild Horses
- Wild Isle Luau
- Willy Wonka
- Winter Friends
- Wisconsin Badgers
- Wizard of Oz
- Wizard of Oz Party
- Wizards of Waverly Place
- Wonder Pets
- Wonder Woman
- Wonderful Wizard of Oz
- Woodland Gnome
- Wow Wow Wubbzy
- WWE
- WWE Party
- X-Men
- Yellow and White Dots
- Yo Gabba Gabba
- Yo Gabba Gabba! 1st Birthday
- Yo Gabba Gabba! 2nd Birthday
- Yo Gabba Gabba! Party
- Zebra
- Zebra Graduation
- Zoology
- Age
- Category
- Bags & Purses
- Balloon Accessories
- Balls
- Banners
- Bean Bags
- Belts
- Blowouts & Noisemakers
- Books, Notepads & Pens
- Boots
- Bubbles
- Cake & Cupcake Stands
- Cake Candles
- Cake Pans
- Cake Toppers
- Candy Party Favors
- Candy Supplies
- Capes
- Centerpieces
- Classic Pinatas
- Confetti
- Cookie Supplies
- Coolers
- Crepe Paper
- Cupcake Liners & Cupcake Wrappers
- Cupcake Picks & Cupcake Rings
- Cupcake Stands
- Cups
- Curling Ribbon
- Decorating Kits
- Decorations
- Dessert Plates
- Dinner Plates
- Empty Favor Boxes
- Face & Body Parts
- Facial Hair
- Fangs & Teeth
- Filled Favor Boxes
- Glasses
- Gloves & Armbands
- Hats
- Hats, Headbands & Masks
- Headbands & Tiaras
- Invitations
- Invitations & Thank Yous
- Jewelry
- Jewelry & Accessories
- Keychains
- Kits
- Latex Balloons
- Makeup
- Masks
- Mylar Balloons
- Name Tags
- Napkins
- Other
- Other Cake & Cupcake
- Other Decorations
- Other Favors & Toys
- Other Tableware
- Pantyhose & Garters
- Pantyhose & Tights
- Pinata Accessories
- Placemats
- Props
- Pull-String Pinatas
- Servingware & Trays
- Shoe Covers
- Shoes
- Signs & Standups
- Solid Color Bowls
- Solid Color Cups
- Solid Color Cutlery
- Solid Color Dessert Plates
- Solid Color Dinner Plates
- Solid Color Forks & Spoons
- Solid Color Napkins
- Solid Color Placemats
- Solid Color Servingware & Trays
- Solid Color Tablecovers
- Souvenir Cups & Bottles
- Sprinkles, Jimmies & Edible Toppings
- Stickers & Tattoos
- Swords & Shields
- T-Shirts & Clothing
- T-Shirts and Clothing
- Tablecovers
- Thank Yous
- Tiaras & Crowns
- Ties & Scarves
- Toys
- Treat Bags
- Tutus & Petticoats
- Undergarments
- Wall, Ceiling & Door Decorations
- Wands
- Weapons
- Wigs
- Wings
- Celebration
- 1st Birthday
- 21st Birthday
- 2nd Birthday
- 30th Birthday
- 40th Birthday
- 4th of July
- 50th Birthday
- 60th Birthday
- Baby Shower
- Bachelorette Party
- Baptism/Christening
- Bar Mitzvah/Bat Mitzvah
- Birthday
- Bridal Shower
- Christmas
- Cinco de Mayo
- Communion/Confirmation
- Dress Up
- Easter
- Everyday
- Football / Superbowl
- Graduation
- Halloween
- Mardi Gras
- Mother's / Father's Day
- New Year's
- Oktoberfest
- Prom
- Retirement
- St. Patrick's Day
- Sweet 16
- Thanksgiving
- Valentine's Day
- Wedding
- Welcome Home
- Gender
- Theme Genre
- Alice in Wonderland
- Angels & Devils
- Animals
- Animals & Insects
- Books
- Bunny Suits
- Cars & Trucks
- Classic
- Clown
- Comics
- Cowboys & Indians
- Disco
- Disney
- Egyptian
- Fairy
- Fairytale & Storybook
- Fiesta
- Flapper
- Flowers
- Food & Beverage
- Gangster
- Geisha
- Gothic
- Grecian & Roman
- Gypsy
- Halloween Movies
- Hippie
- Historical
- Holiday
- Horror
- Humorous
- Irish & Scottish
- Kings & Queens
- Luau
- Luau & Fiesta
- Magic
- Mardi Gras
- Military
- Monsters
- Music
- Ninja
- Occupations
- Other
- Patriotic
- Pimp
- Pirates
- Political
- Prehistoric
- Princess
- Religious
- Renaissance & Medieval
- Santa Suits & Elves
- Sexy
- Skeletons
- Space & Aliens
- Sports
- Steampunk
- Superheroes
- Supplies
- TV & Movies
- Vampires
- Video Games
- Viking
- Vikings
- Werewolf
- Witches
- Shop By Themes
- Cake decorations
- Category
- Cake & Cupcake Stands
- Cake Boards
- Cake Candles
- Cake Decorating Kits & Cupcake Decorating Kits
- Cake Pans
- Cake Toppers
- Cookie Cutters
- Cookie Supplies
- Cupcake Liners & Cupcake Wrappers
- Cupcake Picks & Cupcake Rings
- Cupcake Stands
- Edible Cake Images
- Fondant, Gumpaste & Fondant Tools
- Food Colors
- Food Flavors
- Ingredients
- Other Cake & Cupcake
- Packaging
- Royal Icing Flowers
- Servingware & Trays
- Sprinkles, Jimmies & Edible Toppings
- Sugar Cake Decorations (Dec-ons)
- Utensils & Smallwares
- Celebration
- Shop By Themes
- 1 Love Puppies 1st Birthday
- A New Little Prince
- Abby Cadabby
- Aloha Birthday
- Aloha Luau
- American Idol
- Angry Birds
- Avatar
- Bakugan
- Barbie All Doll'd Up
- Baseball
- Baseball Birthday
- Basketball
- Basketball Birthday
- Batman Dark Knight
- Ben 10 Alien Force
- Bowling
- Bratz
- Butterflies and Dragonflies
- Camo Gear
- Captain America
- Card Night
- Cats & Kittens
- Cinderella Dreamland
- Congrats Grad Blue Graduation
- Congrats Grad Green Graduation
- Congrats Grad Orange Graduation
- Congrats Grad Purple Graduation
- Congrats Grad Red Graduation
- Congrats Grad White Graduation
- Congrats Grad Yellow Graduation
- Construction Pals
- Crayola
- Curious George
- Dinosaurs
- Disney Junior Sofia the First
- Disney Mickey Fun and Friends
- Disney Minnie Dream Party
- Disney Princess Dreams
- Disney Princess Fairytale Friends
- Disney's Cars 2
- Disney's World of Cars
- Dora and Friends
- Dots and Stripes Birthday
- Easter Tulips
- Fairy Princess 1st Birthday
- Faithful Dove Blue
- Faithful Dove Pink
- Falling Flakes
- Fiesta Grande
- Football
- Football Birthday
- Froggie Fun
- Garden Fairy
- Garden Party
- Giddy Up Cowboy
- Gingham Check
- Girl's Lil' Cupcake 1st Birthday
- Girl's Lil' Cupcake 2nd Birthday
- Girl's Little 1
- Girls Only
- Go, Diego, Go!
- Golf
- Goth Feast
- Handy Manny
- Hannah Montana Rock the Stage
- Hanukkah Fun
- Harley Davidson
- Harry Potter Deathly Hallows
- Hello Kitty Balloon Dreams
- High School Musical
- Hooray for Elmo
- Hot Wheels Speed City
- How to Train Your Dragon 2
- I Do Bridal Shower
- I Do Wedding
- I Love Puppies 1st Birthday
- ICarly
- John Deere
- John Deere Pink 1st Birthday
- Joyful Snowman
- Just Dance
- Just Ducky 1st Birthday
- King of the Jungle Baby Shower
- Knight
- Kung Fu Panda 2
- LadyBugs
- Lil' Angel 1st Birthday
- Lil' Rebel 1st Birthday
- Lil' Slugger 1st Birthday
- Little Dino 1st Birthday
- Little Mermaid
- Littlest Pet Shop
- Marvel Super Hero Squad
- Mickey Mouse Clubhouse
- Mickey's 1st Birthday
- Midnight Dreary
- Minnie Mouse
- Mis Quince
- Nascar Full Throttle
- Ni Hao, Kai-Lan
- Nickelodeon Teenage Mutant Ninja Turtles
- Pink Ribbon
- Pirate Party
- Pirates of the Caribbean
- Pokemon
- Pooh and Friends
- Pooh's 1st Balloon
- Pooh's Happy Day
- Power Rangers Jungle Fury
- Princess and the Frog
- Queen of the Jungle
- Robots 2nd Birthday
- Rock Star 2nd Birthday
- Safari Party
- Scooby Doo
- Sea Life
- Sesame Street Beginnings 1st Birthday
- Sesame Street Sunny Days
- Smurfs
- Soccer Birthday
- Special Forces
- Spider-Man Spider Sense
- SpongeBob
- Sports
- Star Wars Clone Wars
- Strawberry Shortcake
- Stripe Style
- Superman
- Sweet Pea Baby Shower
- Sweet Safari Blue 1st Birthday
- Sweet Safari Pink 1st Birthday
- Tea For You
- Teenage Mutant Ninja Turtles
- Thanksgiving Blessing
- The Twilight Saga: Eclipse
- Thomas the Tank Engine
- Thor: The Mighty Avenger
- Tie Dye Fun
- Tinker Bell
- Tinker Bell and the Fairies
- Tom and Jerry
- Topsy Turvy Tea Party
- Toy Story 3
- Transformers Revenge of the Fallen
- Tropical Vacation
- Umbrellaphants Pink Baby Shower
- Under Construction
- Valentine Cupcake
- Western Bandanarama Birthday
- Whale of Fun 1st Birthday
- Willy Wonka
- Winter Friends
- Wizards of Waverly Place
- Wonder Pets
- Wonderful Wizard of Oz
- Wow Wow Wubbzy
- Yo Gabba Gabba
- Yo Gabba Gabba! 2nd Birthday
- Zebra
- Theme Genre
- Category
- Costumes
- Age
- Category
- Celebration
- Gender
- Shop By Themes
- A Nightmare on Elm Street
- Aladdin
- Alice in Wonderland
- Animal Planet
- Austin Powers
- Avatar
- Avengers Assemble
- Batgirl
- Batman
- Beauty and the Beast
- Beetlejuice
- Captain America
- Cinderella
- Crayola
- Dallas Cowboys
- DC Comics
- Despicable Me
- Despicable Me 2
- Disney Frozen
- Disney Junior Sofia the First
- Dora and Friends
- Edward Scissorhands
- Elf
- Elvis Presley
- Fairytale & Storybook
- Friday the 13th
- Ghostbusters
- Halo 3
- Harry Potter
- How to Train Your Dragon
- How to Train Your Dragon 2
- I Love Lucy
- Indiana Jones
- Jake and the Neverland Pirates
- Kings & Queens
- LadyBugs: Oh So Sweet
- Lalaloopsy
- Little Mermaid
- Little Red Riding Hood
- Looney Tunes
- M&M's
- Marilyn Monroe
- Mermaids Under the Sea
- Michael Jackson
- Mickey Mouse Clubhouse
- Minnie Mouse
- Monster High
- Monsters Inc.
- NASA
- Nickelodeon Teenage Mutant Ninja Turtles
- Nightmare On Elm Street
- Ninja Warrior Party
- Pac-Man
- Peter Pan
- Pirates of the Caribbean
- Power Rangers
- Predator
- Rainbow
- Rapunzel
- Reno 911
- Scooby Doo
- Sesame Street
- Shrek
- Skylanders
- Sleeping Beauty
- Smurfs
- Snow White
- Spiderman
- SpongeBob
- Star Trek
- Star Wars
- Sucker Punch
- Super Mario Brothers
- Supergirl
- Superman
- Teenage Mutant Ninja Turtles
- The Addams Family
- The Flintstones
- The Incredibles
- The Lord of the Rings
- The Munsters
- The Nightmare Before Christmas
- The Pirates of the Caribbean
- Tim Burton's The Nightmare Before Christmas
- Tinker Bell
- Tom and Jerry
- Toy Story
- Transformers
- Universal Studios Monsters
- V for Vendetta
- Wizard of Oz
- Wonder Woman
- Zorro
- Theme Genre
- Angels & Devils
- Animals
- Animals & Insects
- Bunny Suits
- Classic
- Clown
- Comics
- Couples
- Cowboys & Indians
- Disco
- Disney
- Egyptian
- Fairy
- Fairytale & Storybook
- Fiesta
- Flapper
- Food & Beverage
- Gangster
- Ghosts
- Gothic
- Grecian & Roman
- Gypsy
- Halloween Movies
- Hippie
- Historical
- Holiday
- Horror
- Humorous
- Irish & Scottish
- Kings & Queens
- Luau
- Magic
- Mardi Gras
- Mascots
- Military
- Monsters
- Music
- Ninja
- Occupations
- Other
- Patriotic
- Pimp
- Pirates
- Plus Size
- Prehistoric
- Princess
- Pumpkins
- Religious
- Renaissance & Medieval
- Santa Suits & Elves
- Sexy
- Skeletons
- Space & Aliens
- Sports
- Steampunk
- Superheroes
- Supplies
- TV & Movies
- Vampires
- Video Games
- Viking
- Werewolf
- Witches
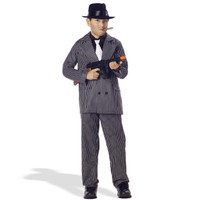
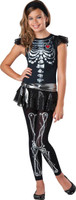
Incredible Edible Crafts
Posted on Feb 1st 2016

|
"Incredible Edible Crafts"
Enjoy these fun projects with your children by letting your imagination be your guide… be an "un-grownup", it's fun! |
| ||||||||||||||||||||||||||||||||||||||||||||||||
Energy Bars - Nutrifit not only makes excellent energy bars, but also provides cooking, eating, and living well services and products for individuals, businesses, and the public sector.